V380s on windows pc
Содержание:
- iPhone IOS Smart Phone Installation
- iPhone IOS Smart Phone Installation
- Суть приложения в двух словах
- Android Smart Phone Installation
- Особенности и преимущества
- Как установить на ПК
- Минусы, отмеченные пользователями
- Android Smart Phone Installation
- V380 — программа для видеонаблюдения для мобильных устройств. Скачать. Инструкция
- Инструкция настройки
iPhone IOS Smart Phone Installation
WiFi smart link installation (with WiFi Network)
1. Open Apple App Store, search, download, and install V380
2. Connect the power plug to the camera and place the camera “right next” to your WiFi router.
Camera sound: “System is starting”
Camera sound: “System startup completed”
3. Press and hold the reset button on the back of the camera until you hear the following sound:
Camera sound: “Restore factory default setting”
Camera sound: “Waiting for WiFi smart link configuration”
4. Open the app V380
Click on “WiFi Smart Link”
5. Your phone has to be connected to your WiFi network. You should then see your network name under WiFi Name. Enter your WiFi password and press next on the following screen:
6. You will see the following screen, searching for the camera through your WiFi connection
Camera sound: “Configuration received”
Camera sound: “WiFi connecting”
Camera sound: “WiFi connected”
7. Successfully installed
Note: “Add manually” option is for when a camera is already connected to your home network and you would like add the camera to another phone. You can simply press “Lan Search” or Type in the Device ID (located on the bottom of the camera) and click “Add to list” on the following page to add an already configured camera to your phone.
AP (Access Point) installation (withor without WiFi Network)
1. Open Apple App Store, search, download, and install V380
2. Connect the power cableto the camera
Camera sound: “System is starting”
Camera sound: “System startup completed”
3. Press and hold the reset button on the back of the camera to until you hear the following sound:
Camera sound: “Restore factory default setting”
Camera sound: “Waiting for WiFi smart link configuration”
4. Press and hold the reset button againon the back of the camera for 1-2 seconds Camera sound: “Access point establishing”
Camera sound: “Access point established”
5. On your phone, go to Settings -> WLAN and connect to the WiFi network that starts with MV and ends with 8 digits. For example MV12345678. This is your camera access point.
6. Open the app V380
Click on “Add Manually”
7. Your phone has to beconnected to the camera access point. On the following screen, you can simply press “Lan Search” or Type in the Device ID (located on the bottom of the camera) and click Add to list on the following screen to add the camera to your device list:
8. When your phone successfully connects to the camera, you will see your camera on the Device List.
Now your camera is setup to connect directly to your phone and can only be accessed when your phone is near the camera access point signal. To configure your camera to your WiFi network, please place the camera next to your WiFi router and. continue the following steps.
9. Click “Settings” on the bottom menu will bring you to this screen.
You will see your device ID at the top. Click “Network.”
10. Check “Station (Work with router). The “WIFI List Near the device” will populate with nearby networks. Choose your WiFi network and type in your WiFi password and press return. Then click “Save” at the very top.
Camera sound: “WiFi Connecting”
Camera sound: “WiFi Connected”
11. On your phone, go to Settings ->WLAN and connect to your WiFi network. Reopen the V380 app and click “Device List” at the bottom. You should see the camera on the device list.
12. Successfully Installed
iPhone IOS Smart Phone Installation
WiFi smart link installation (with WiFi Network)
1. Open Apple App Store, search, download, and install V380
2. Connect the power plug to the camera and place the camera “right next” to your WiFi router.Camera sound: “System is starting”Camera sound: “System startup completed”3. Press and hold the reset button on the back of the camera until you hear the following sound:Camera sound: “Restore factory default setting”Camera sound: “Waiting for WiFi smart link configuration”4. Open the app V380
Click on “WiFi Smart Link”5. Your phone has to be connected to your WiFi network. You should then see your network name under WiFi Name. Enter your WiFi password and press next on the following screen:
6. You will see the following screen, searching for the camera through your WiFi connection
Camera sound: “Configuration received”Camera sound: “WiFi connecting”Camera sound: “WiFi connected”7. Successfully installed
Note: “Add manually” option is for when a camera is already connected to your home network and you would like add the camera to another phone. You can simply press “Lan Search” or Type in the Device ID (located on the bottom of the camera) and click “Add to list” on the following page to add an already configured camera to your phone.
AP (Access Point) installation (withor without WiFi Network)
1. Open Apple App Store, search, download, and install V380
2. Connect the power cableto the cameraCamera sound: “System is starting”Camera sound: “System startup completed”3. Press and hold the reset button on the back of the camera to until you hear the following sound:Camera sound: “Restore factory default setting”Camera sound: “Waiting for WiFi smart link configuration”4. Press and hold the reset button againon the back of the camera for 1-2 seconds Camera sound: “Access point establishing”Camera sound: “Access point established”5. On your phone, go to Settings -> WLAN and connect to the WiFi network that starts with MV and ends with 8 digits. For example MV12345678. This is your camera access point.
6. Open the app V380
Click on “Add Manually”7. Your phone has to beconnected to the camera access point. On the following screen, you can simply press “Lan Search” or Type in the Device ID (located on the bottom of the camera) and click Add to list on the following screen to add the camera to your device list:
8. When your phone successfully connects to the camera, you will see your camera on the Device List.
Now your camera is setup to connect directly to your phone and can only be accessed when your phone is near the camera access point signal. To configure your camera to your WiFi network, please place the camera next to your WiFi router and. continue the following steps.9. Click “Settings” on the bottom menu will bring you to this screen.You will see your device ID at the top. Click “Network.”10. Check “Station (Work with router). The “WIFI List Near the device” will populate with nearby networks. Choose your WiFi network and type in your WiFi password and press return. Then click “Save” at the very top. Camera sound: “WiFi Connecting”Camera sound: “WiFi Connected”11. On your phone, go to Settings ->WLAN and connect to your WiFi network. Reopen the V380 app and click “Device List” at the bottom. You should see the camera on the device list. 12. Successfully Installed
Суть приложения в двух словах
Прошли времена, когда для каждого действия требовалась помощь профессионалов – зачастую, обходящаяся недешево. Теперь любой может в пару кликов обрезать фото, смонтировать ролик или организовать систему видеонаблюдения! Речь, конечно, идет о программной части – физическая установка камер все равно потребует некоторых навыков и инструментов.
Тем не менее, регистрация не обязательна. Вы можете просто скачать V380 на ПК на русском, подключить свои камеры одним из доступных способов – через Wi-Fi, сотовую сеть и так далее – и начать процесс управления! Переименовывайте камеры для своего удобства, меняйте их местами в списке и открывайте на весь экран. Также можно увеличивать изображение при необходимости и просматривать архивы видеозаписей за несколько дней.
Одним словом, ничто не пройдет мимо вашего внимания. V380 используют, например, когда надо организовать установку камер на даче, в подъезде или коридоре. В этим приложением вы всегда можете быть спокойны за сохранность имущества. Оно устанавливается на мобильные устройства, и вы в любой момент сможете посмотреть, что происходит на контролируемом участке. Есть и более неожиданные применения – например, проверка, выключен ли газ и заперта ли дверь. Всегда можно обратиться к архиву и посмотреть, выполняли ли вы эти действия. Так что при помощи приложения можно также и побороть излишнюю тревожность.
Android Smart Phone Installation
WiFi smart link installation (with WiFi Network)
1. Open Play Store, search, download, and install V380
2. Connect the power plug to the cameraand place the camera “right next” to your WiFi router.
Camera sound: “System is starting”
Camera sound: “System startup completed”
3. Press and hold the reset button on the back of the camera until you hear the following sound:
Camera sound: “Restore factory default setting”
Camera sound: “Waiting for WiFi smart link configuration”
4. Open the app V380
Click on “WIFI quick setup”
5. Your phone has to be connected to your WiFi network. You should then see your network name under WiFi name. Enter your WiFi password and press “Next step” on the following screen:
6. You will see the following screen, searching for the camera through your WiFi connection
Camera sound: “Configuration received”
Camera sound: “WiFi connecting”
Camera sound: “WiFi connected”
7. Successfully installed
Note: “Searching device” and “Device Linked” option is for when a camera is already connected to your home network and you would like add the camera to another phone. Simply clicking “Searching device” will add an already configured camera to your phone. Or you can click the + icon on the top right and click Device Linked, then click “Lan Search” or Type in the Device ID (located on the bottom of the camera) and click “Confirm Add” on the following screen to add analready configured camera to your phone.AP (Access Point) installation (with or without WiFi Network)
1. Open Play Store, search, download, and install V380
2. Connect the power cable to the cameraand place the camera next to your WiFi router.
Camera sound: “System is starting”
Camera sound: “System startup completed”
3. Press and hold the reset button on the back of the camera to until you hear the following sound:
Camera sound: “Restore factory default setting”
Camera sound: “Waiting for WiFi smart link configuration”
4. Press and hold the reset button again on the back of the camera for 1-2 seconds
Camera sound: “Access point establishing”
Camera sound: “Access point established”
5. On your phone, go to Settings -> WLAN and connect to the WiFi network that starts with MV and ends with 8 digits. For example MV12345678. This is your camera access point.
6. Open the app V380
Click on “WIFI quick setup”
Click on “AP Quick Setup” will bring you to the Quick Configuration screen.
7. You will see the camera access point name under Quick Configuration. Click on the name to connect to the camera.
8. You should see a list of nearby WiFi networks. Choose your WiFi network and type in your WiFi password and press return. Then click “Save” at the very top. If you don’t see your network, press the back arrow and repeat step 7.
Camera sound: “WiFi Connecting”
Camera sound: “WiFi Connected”
9. On your phone, go to Settings -> WLAN and connect to your WiFi network. Reopen the V380 app and click “My Device” at the bottom. You should see the camera on the there.
10. Successfully Installed
Особенности и преимущества
Приложение работает при помощи собственных облачных серверов, через которые и проходит видеопоток. Там же вы сможете найти и архив. Примечательно, что за пользование сервисом не надо платить. Конечно, возможны и проблемы – например, если интернет-соединение не самое лучшее, как бывает иногда с мобильной сетью, то могут наблюдаться прерывания или понижение качества, а доступ к архивным записям может затруднен.
- просмотр видео с камер в реальном времени из любого места;
- возможность удаленного управления камерами и направлением вращения – если само устройство это поддерживает;
- возможность удаленного воспроизведения видео и захвата изображения;
- поддержка голосовой и видеосвязи;
- высокое качество видео;
- простые и удобные способы подключения камер;
- высокая безопасность передаваемых данных;
- поддержка множества различных устройств.
Пользоваться V380 просто и удобно, приложение поддерживается множеством различных устройств. Благодаря этому процесс подключения камеры пройдет быстро, и вскоре вы уже сможете приступить к работе. Однако, не обошлось и без недостатков, на которые мы также обязательно укажем.
Как установить на ПК
Приложение легко может заработать на вашем компьютере, если вы установите дополнительную программу: андроид-эмулятор. Эмулятор нужен потому, что версии для Windows пока нет, а в нем запустится и мобильный вариант. Таким образом, вы легко и бесплатно получите привычный и удобный сервис на домашнем ПК.
установите
- запустите LDPlayer;
- войдите через него в Play Market;
- авторизуйтесь с помощью Google-аккаунта;
- найдите приложение через строку поиска;
- перейдите на его страничку и установите.
Если вы не хотите авторизовываться, можно воспользоваться приложениями других магазинов, установив их самостоятельно через apk-файлы, или же напрямую установить само приложение V380 – также при помощи перетаскивания установочного файла в окно эмулятора.
В итоге ярлык приложения появится на домашней странице эмулятора, откуда вы сможете запускать его в любой момент простым кликом.
Минусы, отмеченные пользователями
Пользователи отметили следующие часто встречающиеся недостатки сервиса:
- иногда камеры “отваливаются”, и их приходится перезагружать для восстановления соединения, что не удобно;
- различные торможения и лаги при передаче видео;
- иногда не передается звук;
- сложности с записью видео на карту памяти;
- трудности со входом в учетную запись сервиса;
- последнее обновление принесло множество ошибок, приводящих к невозможности использования приложения в комфортном режиме;
- корректно работает только в домашней сети.
Таким образом, пользователи отметили множество критических недостатков, из-за которых пользование приложением и правда затрудняется или и вовсе становится невозможным. К счастью, такие проблемы встречаются не у всех, и многие вполне успешно настроили камеры и процесс видеонаблюдения через V380. Этому свидетельством стал и достаточно высокий средний балл – 4.0.
Android Smart Phone Installation
WiFi smart link installation (with WiFi Network)1. Open Google Play Store, search, download, and install V3802. Connect the power plug to the cameraand place the camera “right next” to your WiFi router.Camera sound: “System is starting”Camera sound: “System startup completed”3. Press and hold the reset button on the back of the camera until you hear the following sound:Camera sound: “Restore factory default setting”Camera sound: “Waiting for WiFi smart link configuration”4. Open the app V380Click on “WIFI quick setup”5. Your phone has to be connected to your WiFi network. You should then see your network name under WiFi name. Enter your WiFi password and press “Next step” on the following screen:6. You will see the following screen, searching for the camera through your WiFi connectionCamera sound: “Configuration received”Camera sound: “WiFi connecting”Camera sound: “WiFi connected”7. Successfully installedNote: “Searching device” and “Device Linked” option is for when a camera is already connected to your home network and you would like add the camera to another phone. Simply clicking “Searching device” will add an already configured camera to your phone. Or you can click the + icon on the top right and click Device Linked, then click “Lan Search” or Type in the Device ID (located on the bottom of the camera) and click “Confirm Add” on the following screen to add analready configured camera to your phone.AP (Access Point) installation (with or without WiFi Network)1. Open Google Play Store, search, download, and install V3802. Connect the power cable to the cameraand place the camera next to your WiFi router.Camera sound: “System is starting”Camera sound: “System startup completed”3. Press and hold the reset button on the back of the camera to until you hear the following sound:Camera sound: “Restore factory default setting”Camera sound: “Waiting for WiFi smart link configuration”4. Press and hold the reset button again on the back of the camera for 1-2 secondsCamera sound: “Access point establishing”Camera sound: “Access point established”5. On your phone, go to Settings -> WLAN and connect to the WiFi network that starts with MV and ends with 8 digits. For example MV12345678. This is your camera access point.6. Open the app V380Click on “WIFI quick setup”Click on “AP Quick Setup” will bring you to the Quick Configuration screen.7. You will see the camera access point name under Quick Configuration. Click on the name to connect to the camera.8. You should see a list of nearby WiFi networks. Choose your WiFi network and type in your WiFi password and press return. Then click “Save” at the very top. If you don’t see your network, press the back arrow and repeat step 7. Camera sound: “WiFi Connecting”Camera sound: “WiFi Connected”9. On your phone, go to Settings -> WLAN and connect to your WiFi network. Reopen the V380 app and click “My Device” at the bottom. You should see the camera on the there.10. Successfully Installed
V380 — программа для видеонаблюдения для мобильных устройств. Скачать. Инструкция
V380 — программа для подключения p2p панорамных и ptz камер видеонаблюдения. Приложение доступно для мобильных платформ на ios и android, крайне просто в обращении благодаря чему организовать удаленное видеонаблюдение не составит труда.
Принцип создания подключения происходит следующим образом: Камера подключается к сети wi-fi, приложение на телефоне находит его внутри той же сети и сохраняет устройство в памяти программы. Удаленное подключение к камере после добавления устройства в приложении становится доступным из любой точки мира благодаря p2p технологии.
Скачать программу под Android можно по этой ссылке, под iOS — здесь.
Инструкция настройки
Запускаем v380, проходим регистрацию или жмем «Локально» для быстрого добавления, никакой разницы нет. Создание учетной записи облегчает перенос приложения с добавленным устройством на любой другой смартфон или планшет на ios и android.
Для быстрого добавления устройства жмем «Добавить вручную». Подключите камеру к адаптеру питания.
Для ручного добавления в Device ID: Вводим серийный номер указанный на наклейке в основании нашей камеры. Вводим логин и пароль от устройства, «Add to list» — добавит камеру.
Для автоматического добавления жмем «Lan Search», программа сама найдет wi-fi сеть устройства и добавит камеру.
Ставим галку напротив номера камера жмем Add, тем самым получаем доступ к камере. Программа попросит сменить пароль на камере, делаем по желанию.
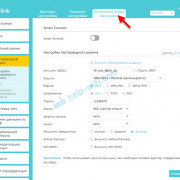
Что бы камера начала работать удаленно, следует перейти в настройки «Settings», выбрать пункт настройки сети «Network settings»
Ставим галку на «Station mode» для поиска нашей wi-fi сети.
Выбираем нашу сеть, вбиваем пароль от нее, подтверждаем «Confirm».
Вот и все! Мы получили доступ к устройству при любом мобильном или wi-fi интернет соединении по всему миру.
Более подробно о настройках Вы можете посмотреть в видео ниже.
2021-02-12T17:12:32+03:005, Сентябрь, 2018|Программы для видеонаблюдения|